


How to Cook a Tomahawk Steak on a Kamado Joe (With Bone Marrow Finish)
Looking to cook a tomahawk steak that actually tastes as good as it looks?** This reverse-sear method on your Kamado Joe delivers a perfectly cooked ribeye with a crispy crust and tender, juicy center—plus a secret weapon finish that takes it over the top.
"Just because it's large doesn't mean it should be intimidating. This is a very simple cook." — Chef Eric
What Makes Tomahawk Steaks Special
A tomahawk steak is essentially a bone-in ribeye with an extra-long rib bone left attached (usually 5+ inches). That dramatic presentation makes it Instagram-ready, but there's more to it than looks. The bone acts as natural insulation during cooking, helping the meat stay juicy while you build flavor through indirect smoking and high-heat searing.
Most tomahawk steaks weigh between 2-3 pounds and can easily feed 2-3 people when sliced. The thick cut (usually 2+ inches) makes them perfect candidates for the reverse-sear method—low and slow first, then a final blast of heat for that steakhouse crust.
Here's the counterintuitive part: As Chef Eric explains, "It's almost easier to cook this big steak than it is a 12-ounce New York strip. There's a lot more wiggle room. If you got your grill at 325, nothing's happening fast, so we have time to continue to check, to flip."
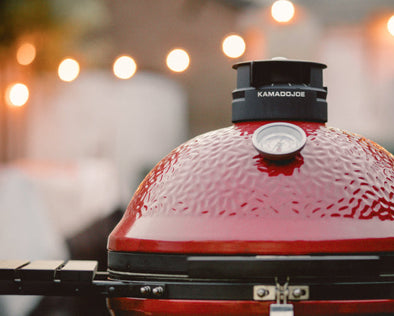
The Kamado Joe Advantage for Cooking Tomahawk Steaks
Your Kamado Joe grill is ideal for cooking tomahawk steaks thanks to its ceramic construction and precise temperature control. The thick walls retain heat exceptionally well, allowing you to hold steady low temps for the initial smoke phase, then crank up to searing temperatures (500°F+) quickly when it's time to finish.
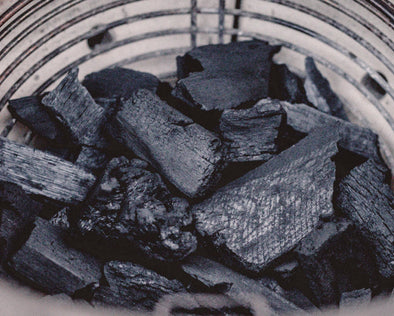
The Divide & Conquer® system makes it easy to set up two-zone cooking—indirect heat on one side for smoking, direct heat for the final sear. This recipe uses hickory or oak wood chunks for subtle smoke flavor that complements the beef without overpowering it.
Pro Tip: Less Smoke is More: Use just one oak or hickory wood chunk buried in the hottest part of your charcoal.
"Smoke is your secret seasoning and a powerful seasoning, so a little goes a long way," says Chef Eric. As the steak cooks, you'll also get smoke from the drippings hitting the charcoal—what Chef Eric calls "the dripping smoke that drops on the charcoal, caramelizes and comes up."
The Bone Marrow Secret
Here's where this recipe gets interesting: instead of butter, you'll finish this tomahawk with roasted bone marrow slathered on both sides. The marrow adds rich, beefy flavor and creates an incredible "board sauce" on your cutting board that you'll roll each slice through before serving. It's an old-school steakhouse technique that makes a noticeable difference.
Chef Eric's take? "Ultra beefy flavor... that's the magic." The bone marrow isn't just for show—it fundamentally changes the flavor profile of the finished steak.
The Three Cuts You're Getting
When you break down a tomahawk steak, you're actually working with three distinct sections:
- The Spinalis (Decal) - "The best part of the entire steer," according to Chef Eric. This is the outer cap muscle that runs along the edge. Slice this into quarter-inch pieces for maximum tenderness.
- The Rib Eye - The large center muscle with beautiful marbling. "There's a lot of fat content in here, but you can fish around and find some nice meat," Chef Eric explains. When cooked properly, all that intramuscular fat renders into moisture and flavor.
- The Bone - Don't overlook this part. As Chef Eric puts it, hand this "to the smallest person in the room" and let them go to town. It's one of the most fun parts of the whole experience.
Key Techniques That Make the Difference
- The "Scruff" Technique: Before seasoning, use your knife to score the surface in a crosshatch pattern. "We're creating more nooks and crannies for caramelization, for smoke adherence, for seasoning," Chef Eric explains. Go deeper on the fat cap to promote rendering.
- Layer Your Seasoning Properly: Don't just dump everything on at once. Salt first to start the osmosis process and wick moisture out. Then add your sweet heat rub. Why so much seasoning? "There's going to be a lot of meat in there that didn't ever see smoke or seasoning," Chef Eric notes. With a 2+ inch thick cut, you need heavy seasoning on the exterior.
- Bank Your Charcoal for the Sear: Here's a technique that prevents disaster: "Notice how I've got all my charcoal banked to one side, so I'm gonna put that meat on this side which is kind of counterintuitive... but we would have a huge flare-up" if you put it directly over the coals. The bone marrow drippings will ignite—you want intense heat, not an inferno.
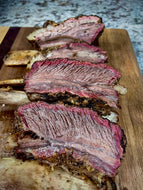
Don't Worry When It Blooms - After slicing, the meat will interact with oxygen and start to "Rouge out"—it'll look more done than it actually is. "Give it a second, let the air hit it, it'll Rouge out and you'll have that beautiful whatever your temp was that you were going for," Chef Eric reassures.
The Reverse-Sear Method Breakdown
- Low & Slow Phase: 325°F for approximately 55-70 minutes (approx. 35 minutes per side) until the internal temperature hits 120°F
- Rest Phase: 10-15 minutes while you raise the grill temperature (this is when the bone marrow soaks in)
- Sear Phase: 30 seconds per side at 500°F+ for a blistering crust
- Total Time: About 90 minutes from start to finish
- Skill Level: Beginner-friendly (seriously—the size actually makes it easier)
- Serves: 2-3 people (or one very hungry person)
Pro Tip: Save the Board Sauce - Any juice on your cutting board after resting is what Chef Eric calls "board sauce"—it's liquid gold. Roll each slice through it before plating for maximum flavor. This is a steakhouse secret that elevates the entire dish.
Why This Method Works
The reverse-sear method gives you incredible control. By bringing the steak up to temperature slowly at 325°F, you're rendering fat, building a smoke ring, and cooking evenly throughout. Then the quick high-heat sear creates that steakhouse crust without overcooking the interior.
As Chef Eric sums it up: "Simple things done perfectly win every time... delicious doesn't have to be difficult. The tomahawk, the bone marrow encrusted tomahawk—it sounds Regal, [but] it's not difficult. Give it a go, have some fun."
Ready to cook? Let's break down the process step by step.


